I recently dug up my well-worn copy of Superman and His Incredible Fortress of
Solitude, the classic oversized comic written by Roy Thomas and drawn by Ross Andru
and Romeo Tanghal in 1981. The comic features guest appearances by Mon-El:
"He doesn't belong in there with those other do-baddres... and I'll never give
up trying to find a way to free him from the Phantom Zone...."
and Supergirl:
"'Supergirl!' It's a name that's been good enough these past several years
since she arrived from a last surviving fragment of Krypton--but one of these fine days
it's going to have to be changed--to Superwoman!"
I selected a panel depicting a battle between Superman and Supergirl for the LSH Art
Gallery. What follows is a step-by-step description of how the panel became part of the Supergirl Display. |
How to Create a Graphic for a LSH Art Gallery Display
|
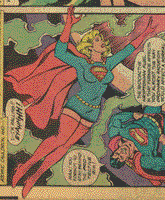 |
First, I scan the panel at 300 dpi as a TIFF, much, much larger than is
pictured here. I open the TIFF in PhotoShop and make sure that Supergirl is oriented the
way I want (and she is) before proceding. I note that a word balloon floats over her
cape, which means that I will have to "reconstruct" part of her cape at some
point. |
|
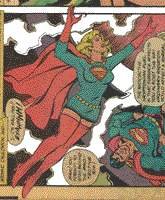
| I begin by "cutting away" all the parts of the panel I don't
need, ie, all the non-Supergirl parts. The scene has a fairly dark background, which is
always bad news when trying to seperate the figure from the rest of the picture (unless
the figure is completely surrounded by a uniformly dark background). Using a selection
tool in PhotoShop, I select the green smoke in the picture and easily cut it out of the
graphic (as it is a uniform color). The rest of the cutting away will be tougher.
|
 |
|
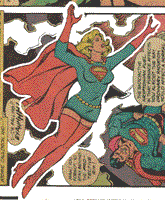 |
Next, I use the eraser tool to painstakingly erase everything around the
figure of Supergirl. This is the longest part. In some cases I use the paths feature of
PhotoShop to create a path "around" a figure. However, in most cases erasing
takes less time and effort.
When I'm done erasing, I use the clone tool to "hide" the word balloon
fragment that hangs over Supergirl's cape. |
|
| Then, I select all of the non-Supergirl parts, following the trail that
the eraser left for me, and delete them. Once I have the figure of Supergirl, I work on
the colors. Because this graphic was scanned from an old comic, it appears dingy. I start
by selecting all of the black in the graphic and creating a new layer on top of the old
graphic, a layer now containing a black line-drawing of Supergirl. Then, like a coloring
book, I fill in the colors between the lines using bright primary colors.
When I'm done, I have a very, very bright graphic layer with a lot of contrast; it is
too bright, in fact. I use this layer as a "filter," setting it to 50% opacity
so that the original dingy Supergirl partially shows through. Then, I use the brightness
and contrast tools on the original layer to brighten her even further. |
 |
|
|
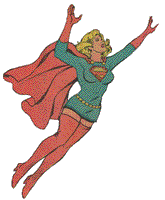
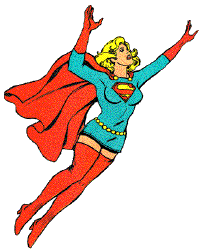
| When I'm done, I resize the graphic to 208x250 at 72 dpi (as you see it above) and
save it as a GIF. And I'm done! If you look carefully, you can see some of the original
texture of the paper and faded colors, particularly in the blue of her outfit and the
peach color of her legs. This is why I use the "filter" method instead of just
recoloring the graphic myself; I want to preserve as much of the original look as possible
while still making it vibrant for the gallery and for the web.
If you have questions about the process or suggestions for making the graphics better,
please send me a message. I would love to hear from you.
Mirror Lad
LSH Art Gallery |
![]()
![]()
![]()
![]()